Under-stair storage turns a space you probably haven’t considered into useful room. According to the National Association of Home Builders, single-family homes typically have 15–20 square feet of unused space beneath stairs. Whether your stairs go to a basement, attic, or just a hallway, this area can store seasonal gear, shoes, or household items while keeping them out of sight. The right setup lets you use the space effectively without changing your home’s look.
What Under-Stair Storage Is and How to Use It
Under-stair storage means making use of the triangular area beneath a staircase, often called the spandrel. Unlike regular cabinets, this space has to work around the staircase’s slope and height limits. It can include enclosed cabinets, drawers, or open shelves, depending on what you need to store.
A 2024 Remodeling Magazine study found homes with well-designed under-stair storage sold faster and for slightly more than similar homes without it. The key is to make storage that’s both easy to reach and fits with your home’s style. You can use it for shoes, coats, pantry items, or laundry supplies.
How Under-Stair Storage Compares to Other Hidden Storage
Hidden storage like built-in cabinets or recessed shelves is common, but under-stair storage uses a different kind of space. While wall cabinets rely on vertical room, under-stair storage makes use of the often-wasted area beneath stairs. The spandrel shape means you need custom or modular systems to fit the slope.
This space also has different load requirements. A drawer under stairs must support the weight of the steps above, while a regular cabinet doesn’t. Accessibility matters too—store items you use often within easy reach. Solutions range from shallow pull-out bins to deep cabinets with slide-out shelves.
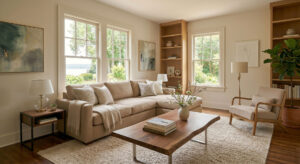
Types of Under-Stair Storage
Not all under-stair storage works the same way. The best choice depends on where your stairs are, what you need to store, and your budget. Here are the main types to consider.
Pull-Out Drawers: Simple and Accessible
Pull-out drawers are one of the easiest under-stair storage options. They let you reach what you need without taking up extra room. Drawers can be custom-sized to fit the staircase slope, with some systems blending into your existing cabinetry. Three or four drawers can hold shoes, seasonal clothes, or pet supplies.
According to the Home Improvement Research Institute, 42% of homeowners renovating under-stair spaces choose pull-out drawers for their versatility and ease of installation. The main challenge is measuring carefully to ensure smooth operation. For steep stairs, look for systems with side-mounted slides.
Open Shelving: Stylish and Easy to Reach
Open shelving under stairs works well in modern or minimalist homes where the staircase itself is a design feature. Shelves at different heights can hold books, baskets, toys, or blankets. A 2025 Houzz survey found 31% of homeowners pick open shelving mainly for looks, but it needs regular tidying to stay neat. Uniform baskets help keep smaller items contained.
Enclosed Cabinets: Private and Protective
Enclosed cabinets keep items dust-free and out of sight. They can match your existing trim or blend into the staircase. Add adjustable shelves or slide-out trays to use vertical space. The National Kitchen and Bath Association recommends enclosed cabinets in homes with kids or pets for safety. Soft-close hinges, used by 68% of homeowners in a 2024 NKBA survey, prevent doors from slamming.
Custom-Built Solutions: Made for Your Space
Custom-built storage fits the exact spandrel dimensions, including odd angles or obstructions. It can mix drawers, cabinets, and open shelves for a cohesive look. A 2025 Architectural Digest report says custom under-stair storage can raise a home’s perceived value by up to 5%, especially in cities where space is limited. Work with a designer who knows structural and aesthetic needs.
Lift-Up Storage: For Awkward Spaces
Lift-up storage uses a hinged door that raises to reveal space inside. It’s good for bulky items like luggage or vacuum cleaners. A 2024 American Society of Interior Designers study found lift-up storage popular in open-concept homes, where it doubles as a room divider. Plan carefully to avoid interfering with stair use or foot traffic.
What to Check Before You Start
Before building, measure your space carefully and check local rules. These steps help avoid expensive mistakes and create storage that lasts.
Measure the Space Accurately
The spandrel is usually triangular, with varying height and depth. Measure these dimensions:
- Height: From floor to bottom of stairs. Check local rules—most require at least 6 feet 8 inches of clearance.
- Depth: From front edge of stairs to wall or obstruction, typically 12–24 inches.
- Width: Length of stairs at widest point, usually 36 inches.
- Slope: Use a protractor or digital gauge to find the angle, which affects drawer or shelf design.
For odd shapes, make a paper or digital template to test layouts. Free tools like SketchUp or Roomstyler can help visualize options before you build.
Design for Easy Use
Storage should be simple to reach and use daily. Follow these tips:
- Place shelves or drawers 24–48 inches from the floor for comfortable access.
- Allow at least 24 inches in front of storage to open drawers or doors fully.
- Add battery-powered LED lights or a small puck light if the space is dim.
- Label bins or use color coding in shared spaces for easy retrieval.
The NKBA reports 72% of homeowners who prioritize accessibility are more satisfied with their projects.
Follow Building Codes and Safety Rules
Check local codes before installing storage. Key points:
- Headroom: Most codes require at least 6 feet 8 inches above storage to prevent head injuries. If your stairs are low, consider lift-up storage instead of enclosed cabinets.
- Load-Bearing: If your stairs support weight, don’t remove structural parts without a structural engineer’s advice.
- Fire Safety: Enclosed storage under stairs may have restrictions, especially if the stairs are part of an escape route.
- Electrical Codes: If adding outlets or lights, hire a licensed electrician to meet local rules.
Use the International Residential Code or ask a local inspector for guidance. Ignoring codes can lead to fines or needing to rebuild.
Choose Materials That Last
Under-stair storage sees more wear than regular cabinets. Pick sturdy materials:
- Plywood: Affordable and strong, works for DIY. Baltic birch plywood resists warping. Paint or stain to match your decor.
- MDF: Budget-friendly and smooth for painting, but less durable. Best for enclosed cabinets in low-traffic areas.
- Solid Wood: Durable and attractive but expensive. Needs regular care to prevent warping. Good for high-end looks.
- Metal: Sleek for modern homes but may clash with traditional styles. Use for industrial or contemporary spaces.
- Melamine: Low-cost and easy to clean but less durable. Good for painted or laminated surfaces on a budget.
Consider humidity and temperature in your home. Basements and attics need moisture-resistant materials like marine-grade plywood or PVC-coated shelves.
Should You DIY or Hire a Pro?
The answer depends on your budget, skills, and how complex your design is. Here’s what to weigh.
DIY Under-Stair Storage: Costs and Benefits
DIY saves money and lets you customize fully. A basic pull-out drawer system can cost under $200, while custom work starts around $1,000. You’ll learn carpentry skills useful for future projects.
Challenges include time—complex builds can take weeks—and the risk of mistakes like misaligned drawers or uneven shelves. If your stairs are straight and you’re comfortable with tools, DIY can work well. For guidance, check step-by-step guides online.
When to Hire a Professional
A pro ensures quality and speed, especially for tricky shapes like spiral stairs or high-end finishes. They handle codes, load-bearing issues, and custom fabrication. Costs range from $1,000 to $5,000 or more.
Hire a contractor if your stairs are complex, you lack time or skills, or you want a seamless, high-end result. Ask friends for referrals or check reviews on Houzz or Angi to find a reputable pro.
How to Build Under-Stair Storage: Step by Step
Ready to start? This guide covers planning, measuring, building, and finishing. Whether you choose drawers, cabinets, or shelves, these steps will help you build storage that works.
Step 1: Plan Your Storage
Sketch your design on paper or use a digital tool like SketchUp or Roomstyler. Ask yourself:
- What will you store? Group items by size, weight, and how often you use them.
- How often will you access these items? Put frequently used things in easy-to-reach spots.
- How will it look? Pick materials and colors that match your home.
- What’s your budget? Add 10–20% for unexpected costs.
See innovative designs for ideas that balance function and style. When your plan is set, make a cutting list and buy materials.
Step 2: Measure and Mark
Measure the spandrel’s height, depth, width, and slope. Mark where storage will go, noting obstructions like outlets, baseboards, or trim. For drawers or cabinets, mark track or hinge positions. For shelves, mark bracket spots.
Use a level and stud finder to keep markings straight. If stairs are load-bearing, avoid cutting structural parts without expert advice.
Step 3: Build the Frame
The frame supports shelves, drawers, or cabinets. Build it from plywood, MDF, or solid wood depending on your design.
Pull-Out Drawers:
- Make a box with ¾-inch plywood for sides, bottom, and back. Leave the front open for the drawer.
- Add vertical supports along the sides to guide the drawer. Use 2x4s or plywood strips.
- Install drawer slides on the frame and drawer sides. Test to ensure smooth gliding.
Enclosed Cabinets:
- Assemble a box with ¾-inch plywood for sides, top, bottom, and back. Leave the front open for the door.
- Add adjustable or fixed shelves inside. Use plywood or solid wood for heavy items.
- Hang the door with soft-close hinges. For lift-up doors, use heavy-duty hinges or a gas strut.
Open Shelving:
- Attach L-shaped brackets to the wall or staircase stringer. Use a level to keep them straight.
- For deeper shelves, add supports or cleats to prevent sagging. Use 1×2 or 1×3 strips.
- Place shelves on brackets and secure with screws or adhesive. For a floating look, use hidden pins or brackets.
Step 4: Install the Storage
Pull-Out Drawers:
- Slide drawers into the frame and test slides. Adjust if they stick or have gaps.
- Attach the frame to the stringer or wall with screws or brackets. Use construction adhesive on the floor for stability.
- Add handles or pulls to make drawers easier to open.
Enclosed Cabinets:
- Lift the cabinet into place and secure it to the stringer or wall with screws or brackets. Check with a level.
- Attach the door with hinges or a lift-up mechanism. Test the door’s movement.
- Add trim or molding around the cabinet. Paint or stain to match your decor.
Open Shelving:
- Place shelves on brackets and secure with screws or adhesive. Use hidden pins or brackets for a floating look.
- Add a thin plywood or MDF backing to hide the wall or stringer. Paint or stain to match.
- Style shelves with baskets or bins to keep items tidy.
Step 5: Test, Adjust, and Finish
Test Function:
- Open and close all drawers, doors, and shelves. Check for smooth operation.
- Look for gaps or misalignments and fix them.
- Load shelves and drawers to test weight capacity. Add supports if they sag or wobble.
Make Adjustments:
- Sand drawer sides or adjust slides if drawers stick.
- Realignment hinges or add a magnetic catch if doors don’t close.
- Use a level to fix uneven shelves and add shims if needed.
Finish Touches:
- Prime, then paint or stain the storage. Use polyurethane or lacquer for durability.
- Install handles, knobs, or pulls that match your style.
- Add battery-powered LED lights or a puck light if the space is dim.
- Style storage with baskets, bins, or decor to keep it neat and attractive.
Match Storage to Your Home’s Style
Under-stair storage can blend in or stand out. Here are ideas for different aesthetics.
Minimalist and Modern
Use flat-panel doors, neutral tones, and clean lines. White or light gray cabinets with no handles look seamless. Natural wood open shelves add warmth. Keep contents organized with uniform baskets or bins. A single plant or small artwork can add personality without clutter. Inspired by architectural elegance, this style focuses on simplicity and function.
Industrial
Embrace raw materials like metal, reclaimed wood, and concrete. Try pull-out drawers with steel tracks and a reclaimed wood front, or open shelves with black pipe brackets. Leave structural elements like the stringer exposed and incorporate them into the design. Mix textures—pair a metal cabinet with a concrete countertop or wooden shelves with black brackets. Choose industrial hardware like black iron pulls or leather straps.
Traditional
Classic details like raised-panel doors, crown molding, and rich wood finishes work well. Use a custom cabinet with glass-front doors to display decor or a lift-up storage with beadboard paneling for a cottage look. Add wainscoting, corbels, or trim to enhance the traditional feel. Warm colors and textures like cherry or mahogany finishes and brass or oil-rubbed bronze hardware add richness. Frame artwork, vintage accessories, or a plush rug to tie the space together.
Rustic
Use natural materials like reclaimed wood, stone, and wrought iron for a cozy feel. Try open shelves with rough-hewn wood planks or lift-up storage with a stone countertop. Add twine-wrapped baskets, galvanized metal bins, or a plaid throw. Choose decor like vintage books, woven blankets, or ceramic vases with dried flowers. Keep colors neutral with earthy greens, browns, or reds.
Mistakes to Avoid
Even a good idea can go wrong without careful planning. Watch out for these common errors.
1. Ignoring the Space’s Shape
The spandrel’s triangle shape needs careful planning. A drawer system for straight stairs won’t work for spiral stairs. Open shelves at the wrong angle can make items hard to reach. Measure accurately and design for the space’s unique shape. Use a template or digital tool to visualize layouts before cutting. If unsure, consult a pro.
2. Sacrificing Accessibility for Looks
It’s easy to focus on design and forget function. High shelves or stiff drawers make storage frustrating. Put items you use often within easy reach and ensure drawers and doors work smoothly. The NKBA found 63% of homeowners who prioritize accessibility are more satisfied with their projects. Use adjustable shelves, pull-out trays, and soft-close hinges to keep storage both functional and stylish.
3. Skimping on Materials
Under-stair storage gets more wear than regular cabinets. Cheap materials like particleboard or weak hardware sag or break. Invest in sturdy materials like plywood, solid wood, or metal, and use heavy-duty hardware. The Home Improvement Research Institute reports 78% of homeowners who regret their project cite poor material choices as the main issue. If on a budget, use high-quality materials for the frame and cheaper finishes.
4. Forgetting Lighting
Dim spaces make it hard to find and use stored items. Add battery-powered LED strip lights or a small puck light inside enclosed cabinets. A 2024 Houzz survey found 56% of homeowners who added lighting reported better function and a more inviting space. Match lighting to your style—warm bulbs for cozy, cool bulbs for modern.
5. Overlooking Codes
Codes exist for safety and structural soundness. Ignoring them can mean fines, rework, or hazards. Common issues include low headroom, improper load support, or electrical risks. Research local codes or ask a pro before starting. If stairs are part of an escape route, enclosed storage may not be allowed. When in doubt, hire a pro to review your plans.
Real-Life Ideas to Try
See how others have used under-stair storage for inspiration.
1. Cozy Reading Nook
Turn the space into a reading spot with open shelves, a cushioned bench, and a small lamp. Fill shelves with books, a throw blanket, and a basket for extra pillows or magazines. Add a rug or curtains to frame the area. Great for homes with kids or book lovers.
2. Compact Pantry
Use enclosed cabinets and pull-out drawers for a small pantry. Add adjustable shelves for canned goods, spices, and dry items. Clear bins keep contents visible. Add a countertop or pull-out cutting board for prep space. Ideal for small kitchens without a pantry.
3. Mudroom Station
Install hooks for coats, cubbies for shoes, and a bench with lift-up storage for bags or shoes. Add a boot tray to catch dirt and moisture. Include a mirror or chalkboard for notes. Perfect for homes with kids or muddy entryways.
4. Home Office Nook
Add a small desk or fold-down table with open shelving for books and supplies. Use baskets for cables and small items. A task lamp and comfy chair make it functional. Good for home offices in tight spaces.
5. Playroom Storage
Use open shelving, cubbies, and pull-out bins for toys, books, and art supplies. Label bins for easy cleanup. Add a small table or chalkboard wall for creative play. Bright decor like a rainbow rug or wall decal makes it inviting.
6. Wine and Bar Storage
Use enclosed cabinets with glass doors to display wine or glassware. Add a countertop or pull-out tray for serving. LED strip lights highlight bottles and create a warm feel. Good for homes with dining rooms or basement bars.
Budget-Friendly Options
You don’t need a big budget to add under-stair storage. With creativity and DIY skills, you can build functional storage without spending much.
1. Repurpose Furniture
Before building new, repurpose an old bookshelf, dresser, or cabinet to fit the spandrel. Trim or modify the back or bottom drawer for open storage. Add doors to hide contents. Check thrift stores, garage sales, or online marketplaces for cheap finds. A fresh coat of paint or stain can make them fit your decor.
2. Use Modular Systems
Modular systems like IKEA ALGOT or KALLAX are affordable and adaptable. They fit odd angles and reconfigure as needs change. A 2025 Consumer Reports study found modular systems cost 40% less than custom work, starting at about $50 per unit. Use baskets or bins to keep items tidy.
3. Build Simple Shelving
Start with L-shaped brackets and plywood or MDF shelves. Paint to match your decor and use baskets for smaller items. Costs are low—brackets and plywood can be under $50. For stability, use heavy-duty brackets and wall anchors.
4. Add a Lift-Up Storage Bench
Build a bench with a hinged seat that lifts for storage inside. Use it as seating in a mudroom or hallway. Store shoes, bags, or seasonal gear underneath. Costs range from $100 to $300 depending on materials and hardware. Add a cushion or throw pillow for comfort.
5. Use Tension Rods and Curtains
For a temporary fix, hang a curtain between the stringer and wall with tension rods. Hide clutter behind fabric that matches your decor. Costs are under $30. Good for renters who want to test the idea first.
Is Under-Stair Storage Right for You?
Under-stair storage turns unused space into functional room. Whether you pick drawers, cabinets, or shelves, this area can store items neatly without changing your home’s look. Plan carefully, measure precisely, and choose materials that last. With the right design, your under-stair space can add both function and style.
See clever storage hacks or hidden storage ideas for more inspiration. The key to success is planning, precision, and a bit of creativity.
Quick Facts
- Under-stair storage uses the triangular area beneath stairs for enclosed cabinets, drawers, or open shelves.
- The spandrel is the triangle formed by the staircase’s stringer and risers.
- Common types include pull-out drawers, open shelving, enclosed cabinets, custom builds, and lift-up storage.
- Key steps: measure the space, design for access, follow codes, and pick durable materials.
- DIY is cheaper but time-consuming; pros ensure quality and speed for complex designs.
- Style options range from minimalist to industrial, traditional, or rustic.
- Avoid mistakes like ignoring the space’s shape, sacrificing function for looks, skimping on materials, forgetting lighting, or overlooking codes.
- Budget ideas include repurposing furniture, using modular systems, building simple shelves, adding a lift-up bench, or using tension rods and curtains.